
Anime Nexus RNG Great Tomb of Nazarick Guide
Clear the Great Tomb of Nazarick floor by floor to collect the ten different gems for the Ring of Ainz Ooal Gown. Each floor has 15 waves and a guardian challenge, with targeting and placement becoming especially important in the Throne Room.
Enter through the Ainx event menu on Halloween Island and clear each floor to unlock the next. Defeat Shalltear's wardens to break her shields, finish Aura and Mare close together to prevent revival, and focus Albedo before her 20-second enrage. On Floor 10, deploy Ainx, reveal assassins with a friendly unit within 12 studs, and defend the route's midpoint against Gate. Each floor's first clear awards its own ring gem; collect all ten and take them to Mei Hatsume.
Entry and floor progression
- Open WARP and travel to Halloween Island.
- Open the Ainx event menu and select Great Tomb of Nazarick.
- Select an unlocked floor and press its Enter button. Floor 1 is open at the start.
- Complete the floor's 15 waves and Floor Guardian challenge, then return to the menu and select the next floor.
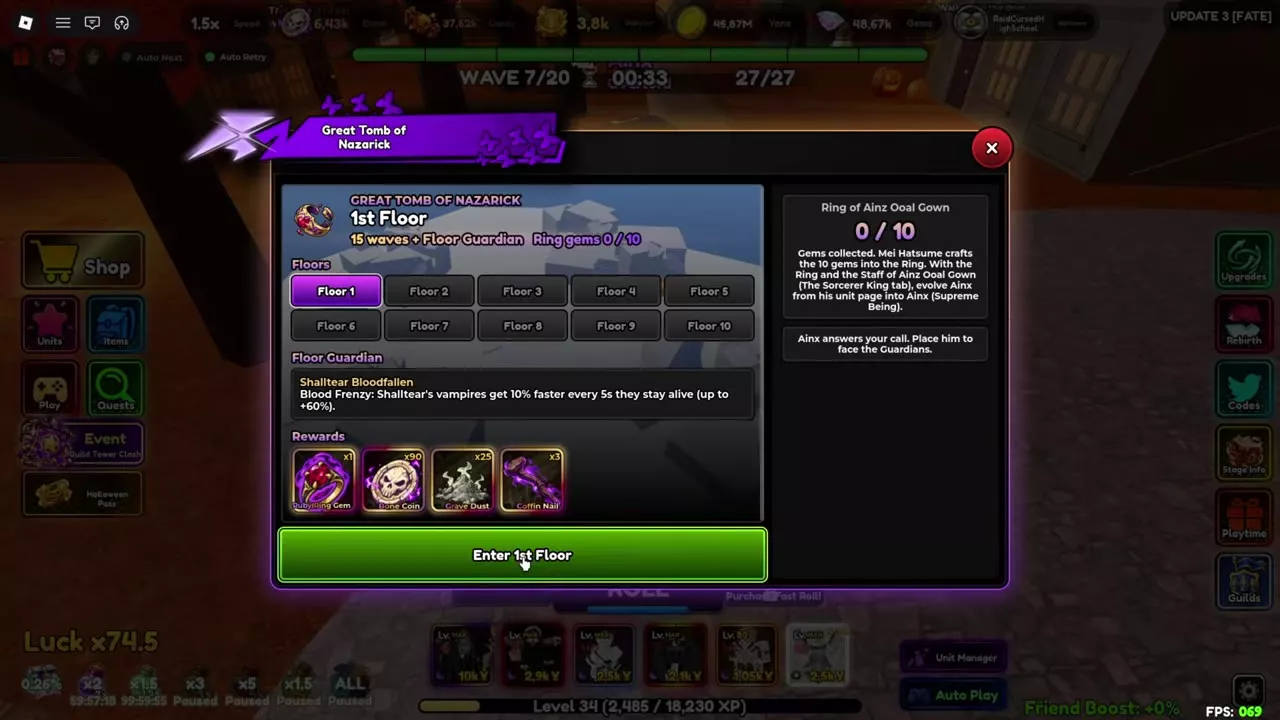
Clear the previous floor to unlock each of Floors 2–10. The selection menu displays the guardian, modifier, reward preview and entry button; hover over a floor button to see its introduction and unlock or clear status.
The Event menu provides another route: open Sorcerer Slayer, use its Leaderboard and information entry to reach the Ainx event panel, then select the Tomb.
Prepare Ainx for the final floor. Its damage-reduction mechanic requires Ainx to be deployed on the battlefield; owning the unit in your inventory does not satisfy that condition.
Floors and guardian mechanics
Floors 1–3: Shalltear Bloodfallen — Blood Frenzy
Defeat vampires early in the route. Each living vampire gains 10% speed every 5 seconds, up to a 60% increase. Concentrating damage near the start gives them less time to accelerate before reaching your later defenses.
Floor 4: Shalltear Bloodfallen — Blood Shield
Shalltear raises her blood shield four times. Defeat her wardens to break it, then resume damaging her. Keep enough coverage to eliminate the wardens whenever the shield returns.
Floor 5: Cocytus — Frozen Court
Cocytus and half of his army cannot be stunned, slowed or frozen. Prioritize damage that kills these enemies within your attack coverage. Control still helps against the remaining enemies, but it cannot hold the entire wave in place.
Floor 6: Aura & Mare — The Twins
Lower both guardians' health together and finish them close together. If one dies while the other remains alive, the defeated twin revives after a delay. Leaving one healthy while focusing down the other creates another guardian to fight.
Floors 7–8: Demiurge and Pandora's Actor
Floor 7 pairs Demiurge with Infernal Curses. Floor 8 pairs Pandora's Actor with Thousand Faces.
Floor 9: Albedo — Overseer's Wrath
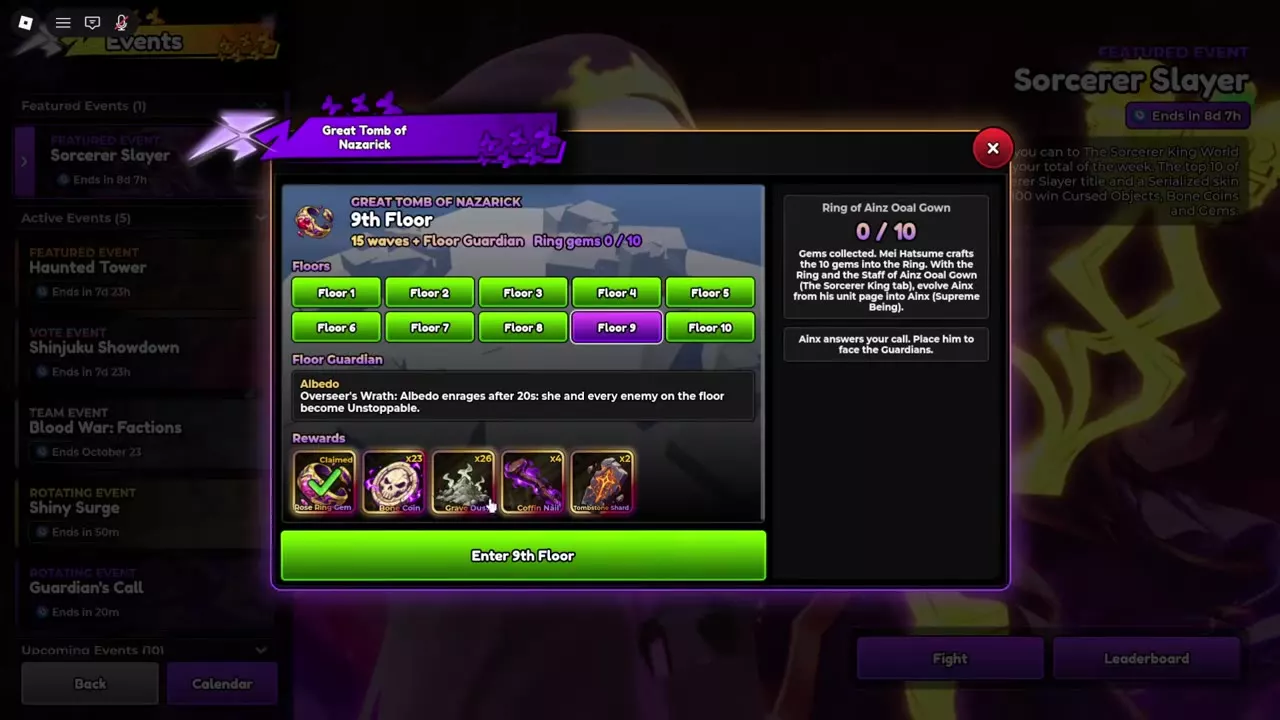
Concentrate damage on Albedo before her 20-second enrage. Once she enrages, both Albedo and every enemy on the floor become Unstoppable, so defeating her quickly prevents that floor-wide change.
Floor 10: The Supreme Guardians — Throne Room
Albedo, Demiurge and Cocytus defend the throne together. Prepare for their combined encounter by arranging close-to-path placements and coverage around the route's midpoint before the assassin and Gate mechanics begin.
For damage-dealer and support selection, use the farming team guide.
Great Tomb of Nazarick
- Floors
-
10 floors
- Waves per floor
-
15 waves
- Access
-
Ainx event menu Open the Ainx event menu on Halloween Island and select Great Tomb of Nazarick.
- Floor unlock
-
Clear the previous floor (Floors 2–10) Floor 1 is open at the start.
- Ring gem collection
-
10 different gems Collect one corresponding gem from each floor's first clear, then take all 10 to Mei Hatsume to craft the Ring of Ainz Ooal Gown.
- Floor Guardian
- 1 × Shalltear Bloodfallen (Floors 1–4)1 × Cocytus (Floor 5)1 × Demiurge (Floor 7)1 × Albedo (Floor 9)
- Floor Guardians
- Aura & Mare (Floor 6)
- Throne Room guardian
- 1 × Albedo (Floor 10)1 × Demiurge (Floor 10)1 × Cocytus (Floor 10)
- Enemy
- Eight-Edge Assassin (Floor 10, from Wave 2)
| Level / Stage | Stat | Value |
|---|---|---|
| Floor 1 | First-clear ring gem | Ruby Ring Gem (First clear)
|
| Floor 1 | First-clear ring gem quantity | 1 gem (First clear)
|
| Floor 1 | First-clear Grave Dust | 25 Grave Dust (First clear)
|
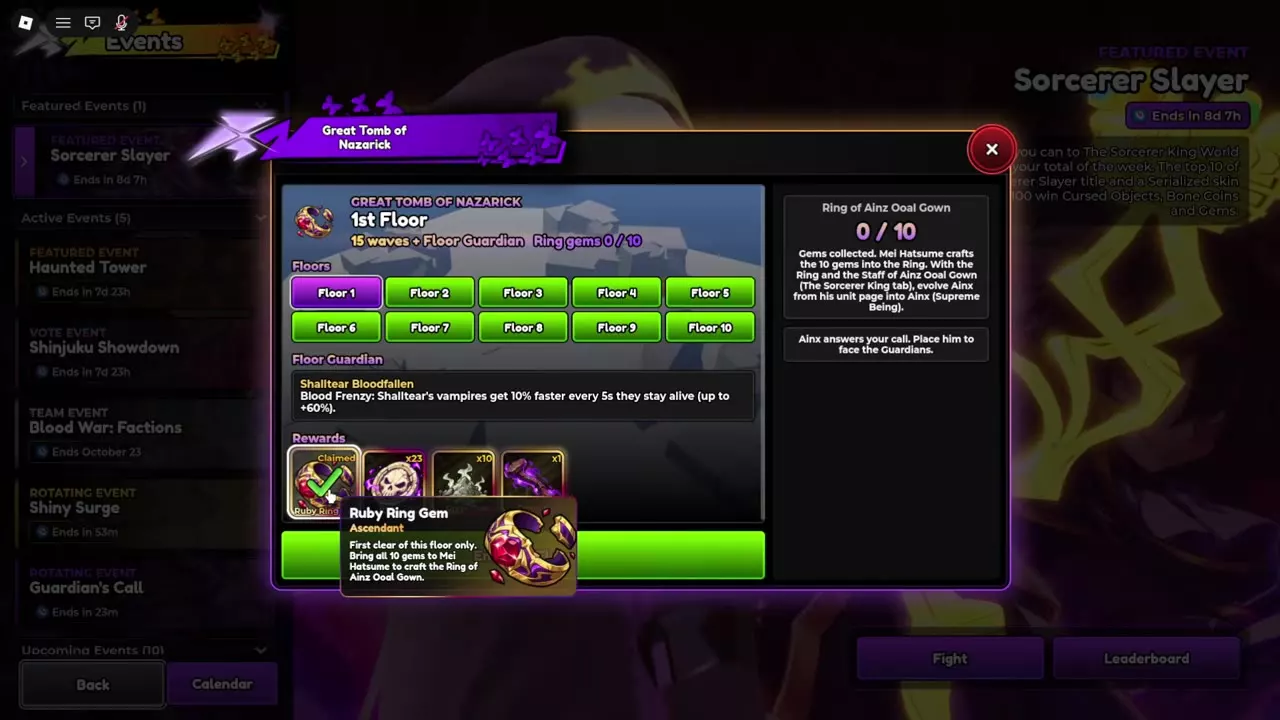
| Floor 1 | Repeat-clear Grave Dust | 10 Grave Dust (After the first clear)
|
| Floor 1 | Coffin Nail reward preview | 3 Coffin Nails (Before the first clear)
|
| Floor 1 | Bone Coin reward preview | 25 Bone Coins (Ring gem already claimed)
|
| Floor 2 | Grave Dust reward preview | 12 Grave Dust
|
| Floor 2 | Coffin Nail reward preview | 1 Coffin Nail
|
| Floor 3 | Grave Dust reward preview | 14 Grave Dust
|
| Floor 3 | Coffin Nail reward preview | 2 Coffin Nails
|
| Floor 3 | Bone Coin reward preview | 25 Bone Coins (Ring gem already claimed)
|
| Floor 4 | Grave Dust reward preview | 16 Grave Dust
|
| Floor 4 | Coffin Nail reward preview | 2 Coffin Nails
|
| Floor 5 | Grave Dust reward preview | 18 Grave Dust
|
| Floor 5 | Coffin Nail reward preview | 2 Coffin Nails
|
| Floor 6 | Grave Dust reward preview | 20 Grave Dust
|
| Floor 6 | Coffin Nail reward preview | 3 Coffin Nails
|
| Floor 9 | Grave Dust reward preview | 26 Grave Dust (Ring gem already claimed)
|
| Floor 9 | Coffin Nail reward preview | 4 Coffin Nails (Ring gem already claimed)
|
| Floor 9 | Bone Coin reward preview | 25 Bone Coins (Ring gem already claimed)
|
| Floor 10 | First-clear ring gem | Diamond Ring Gem (First clear)
|
| Floor 10 | First-clear ring gem quantity | 1 gem (First clear)
|
| Floor 10 | Grave Dust reward preview | 30 Grave Dust
|
| Floor 10 | Coffin Nail reward preview | 4 Coffin Nails
|
| Floor 10 | First-clear Soul Lantern | 1 Soul Lantern (First clear)
|
| Floor 10 | Guardian damage reduction | 90 % (No Ainx deployed) Applies to Albedo, Demiurge and Cocytus in the Throne Room.
|
| Floor 10 | Eight-Edge Assassins start | 2 waves
|
| Floor 10 | Gate starts | 3 waves
|
| Floor 10 | Gate interval | 25 seconds (From Wave 3)
|
| Floor 10 | Enemies moved by Gate | 2 enemies (Each Gate activation) The two rearmost enemies emerge from a gate at the midpoint of the route.
|
| Floor 10 | Stage tags | Guardians · Trial · Nightmare
|
| Floor 10 | Repeat-clear Bone Coin example | 26 Bone Coins (One repeat-clear result) The same clear also awarded evolution materials.
|
5 objects
| Name | Floors |
|---|---|
|
1–4
| |
| |
|
5, 10
| |
| |
|
6
| |
| |
|
7, 10
| |
| |
|
9, 10
| |
| |
Eight-Edge Assassin
- First wave
-
2 waves (Floor 10)
- Reveal distance
-
12 studs (A friendly unit is within range) The assassin cannot be targeted until revealed. Place units close to the route.
- Enemy in
- Great Tomb of Nazarick (Floor 10, from Wave 2)
Clear the Throne Room
- Deploy Ainx. While no Ainx is deployed, Albedo, Demiurge and Cocytus take 90% less damage. Keep Ainx on the battlefield while fighting the guardians.
- Reveal Eight-Edge Assassins from Wave 2. Place friendly units close to the route so that a unit comes within 12 studs of each invisible assassin. Assassins cannot be targeted until revealed. The reveal notification confirms that your units can attack them.
- Cover the midpoint from Wave 3. Every 25 seconds, Gate moves the two rearmost enemies to a gate halfway down the route. Give that area attack coverage instead of concentrating every damage dealer near the entrance.
- Finish Wave 15 and the guardians. Break Demiurge's shield when it is active and continue attacking until the floor is cleared.
Close placement and midpoint coverage serve different purposes: proximity enables assassin targeting, while midpoint damage catches enemies that Gate moves past the opening defenses. Place units where they can fulfill both needs when their coverage allows it.
Open Stage Info during combat to read The Throne Room, Eight-Edge Assassins and Gate modifiers. The panel also contains Possible Drops and Dropped This Stage; the stage carries the Guardians, Trial and Nightmare labels.

First-clear gems and repeat rewards
Each floor awards its own ring gem on the first clear. Floor 1 gives the Ruby Ring Gem, and Floor 10 gives the Diamond Ring Gem. Clear all ten different floors: repeatedly clearing one floor does not supply the gems from the others.
Track the collection with the Ring gems counter in the floor menu. Once you have all 10 different gems, take them to Mei Hatsume's Crafting menu to make the Ring of Ainz Ooal Gown. The crafting recipes page covers the crafting menu and recipes.
First-clear material rewards also differ from repeat rewards. Floor 1 gives 25 Grave Dust on the first clear and 10 Grave Dust on subsequent clears. Floor 10 awards one Soul Lantern on its first clear, alongside its Diamond Ring Gem.
Floor 10's Possible Drops include Bone Coins, Grave Dust, Coffin Nails and Soul Lanterns. A repeat-clear example awarded 26 Bone Coins plus evolution materials. Use that as an individual clear result, rather than a fixed payout for every repeat run.
Ainx evolution and the staff
The completed Ring of Ainz Ooal Gown and Staff of Ainz Ooal Gown are materials for evolving Ainx into Ainx (Supreme Being). Follow the Ainx evolution guide for the level, currency and remaining material requirements.
Earn the staff through The Sorcerer King challenge. The Tomb supplies the ring-gem collection; the staff comes from that separate boss route.